General Cautions
Failure to follow instructions can result in serious injury or death. Make sure purchasers and end users of Muncy Machine & Tool Co., Inc., The Upson-Walton Company, Muncy Measurements, and Muncy Marine and Architectural ("Muncy Industries") products read and understand all warnings and instructions.
All products manufactured, distributed or handled by Muncy Industries are sold with the express understanding that the purchaser and user are thoroughly familiar with the safe and proper assembly, use and application of the product. Misapplication, abuse or improper maintenance can result in serious property damage, injury or death. Responsibility for the use and application of the products rests with the user. Muncy Industries make no guarantee and therefore make no express or implied warranties as to any performance of any of its products that were misapplied, abused or received improper maintenance.
Muncy Industries expressly recommend the following safety precautions when using its products to avoid common misapplications, abuses or maintenances, though acknowledge that many other safety precautions exist.
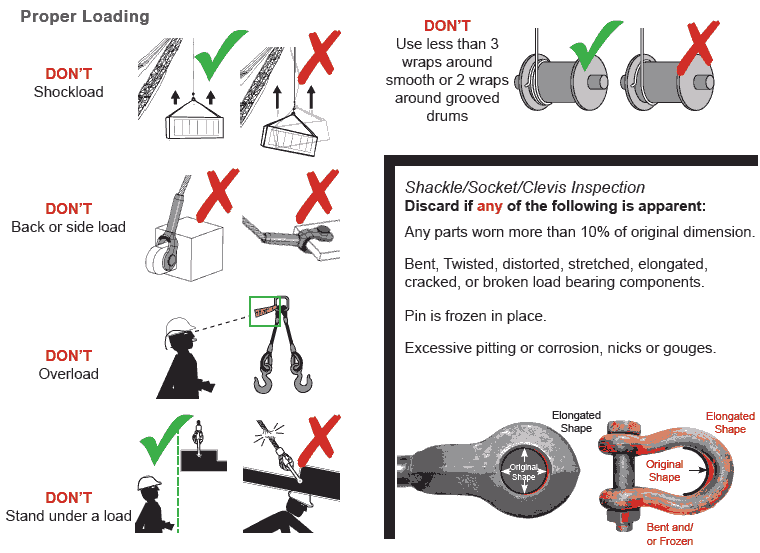
- Avoid jerking, impacting or swinging loads in an unreasonable manner;
- Avoid side loading;
- Conduct all lifting operations in such a manner so that if any equipment fails, no person will be injured;
- Do not weld or modify the fittings;
- Train personnel;
- Use correct rope length; and
- Do not overload or load past the working load limit of the attached wire rope.
If you have any questions as to proper use of any product of Muncy Machine & Tool Co., Inc. and The Upson-Walton Company, please contact (570) 649-5188.
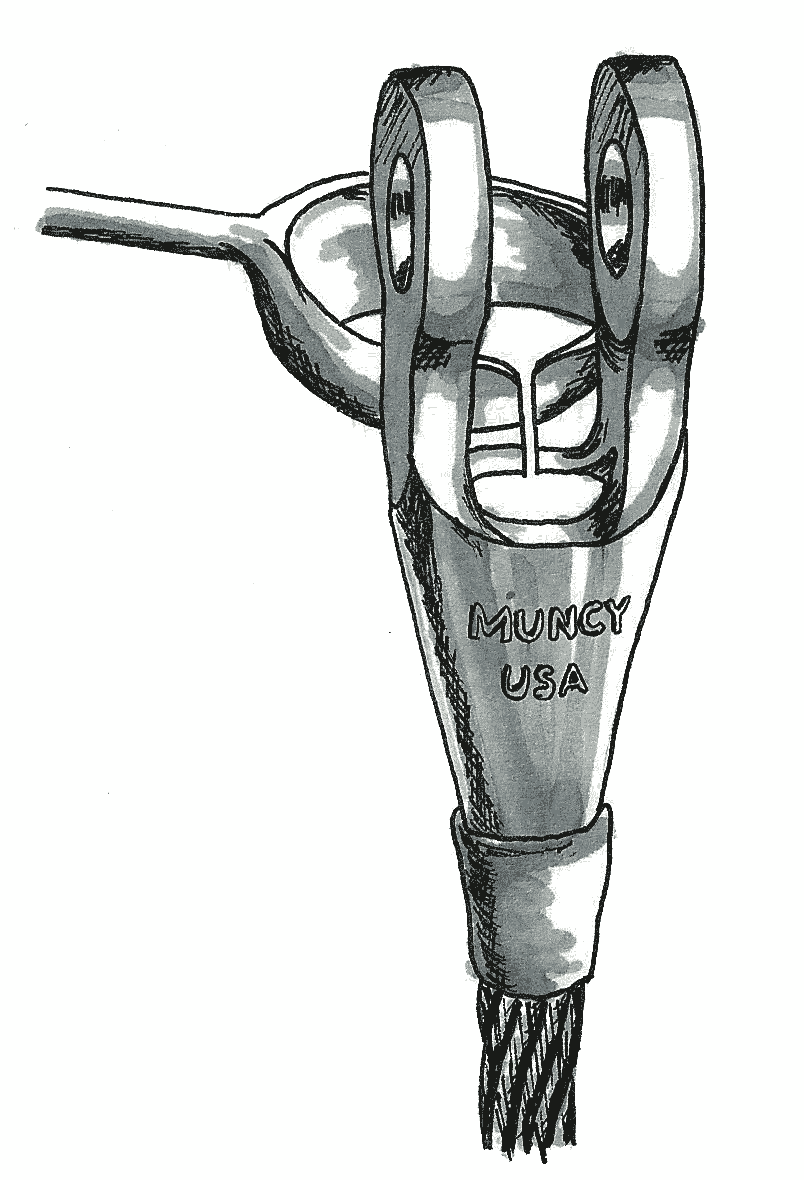
Spelter Sockets
The Following socketing methods are general in nature and have been proven over years of use. Procedures for zinc and resin differ significantly, but will achieve the same result. Slight variations to these procedures have been used with acceptable results, however the effectivness of any change cannot be predetermined without destructive tests.
There are many ways to go wrong in socketing procedures. Some of the more common pitfalls that should be guarded against include:
- Turning back the strands-inward or outward- before the "boom" is inserted into the socket;
- Turning back the strands and seizing them to the body of the rope;
- Turning back the strands and tucking them into the body of the rope;
- Tying a knot in the rope;
- Wedging nails, spikes, bolts, etc. into the socket after the rope is inserted in an attempt to secure a tight fit. This is a particularly dangerous practice.
Socket Reuse
All warranties from Muncy are voided if spelter sockets are reused. If spelter sockets are to be reused, wire rope manufacturers recommend certain procedures to be followed. Contact Muncy for any assistance on dimensional, chemical or physical properties. All sockets that are to be reused should be:
- Magnetic particle inspected (100% of fitting) to locate any cracks (surface defects) that may have developed over the use of the fitting. Discard the socket if any cracks are found.
- Dimensionally checked. The pin hole should not be elongated more than 5% of the original dimension.
- Thermally stress relieved.
Spelter Socketing - Zinc Poured
When using Zinc socketing media, be sure to have adequate ventilation. The Zinc used should meet ASTM specifications designation B6-49 Grade (1) Prime Western or better. MSDS sheets are available from Muncy.
The following steps give a general outline to follow for socketing with Zinc.
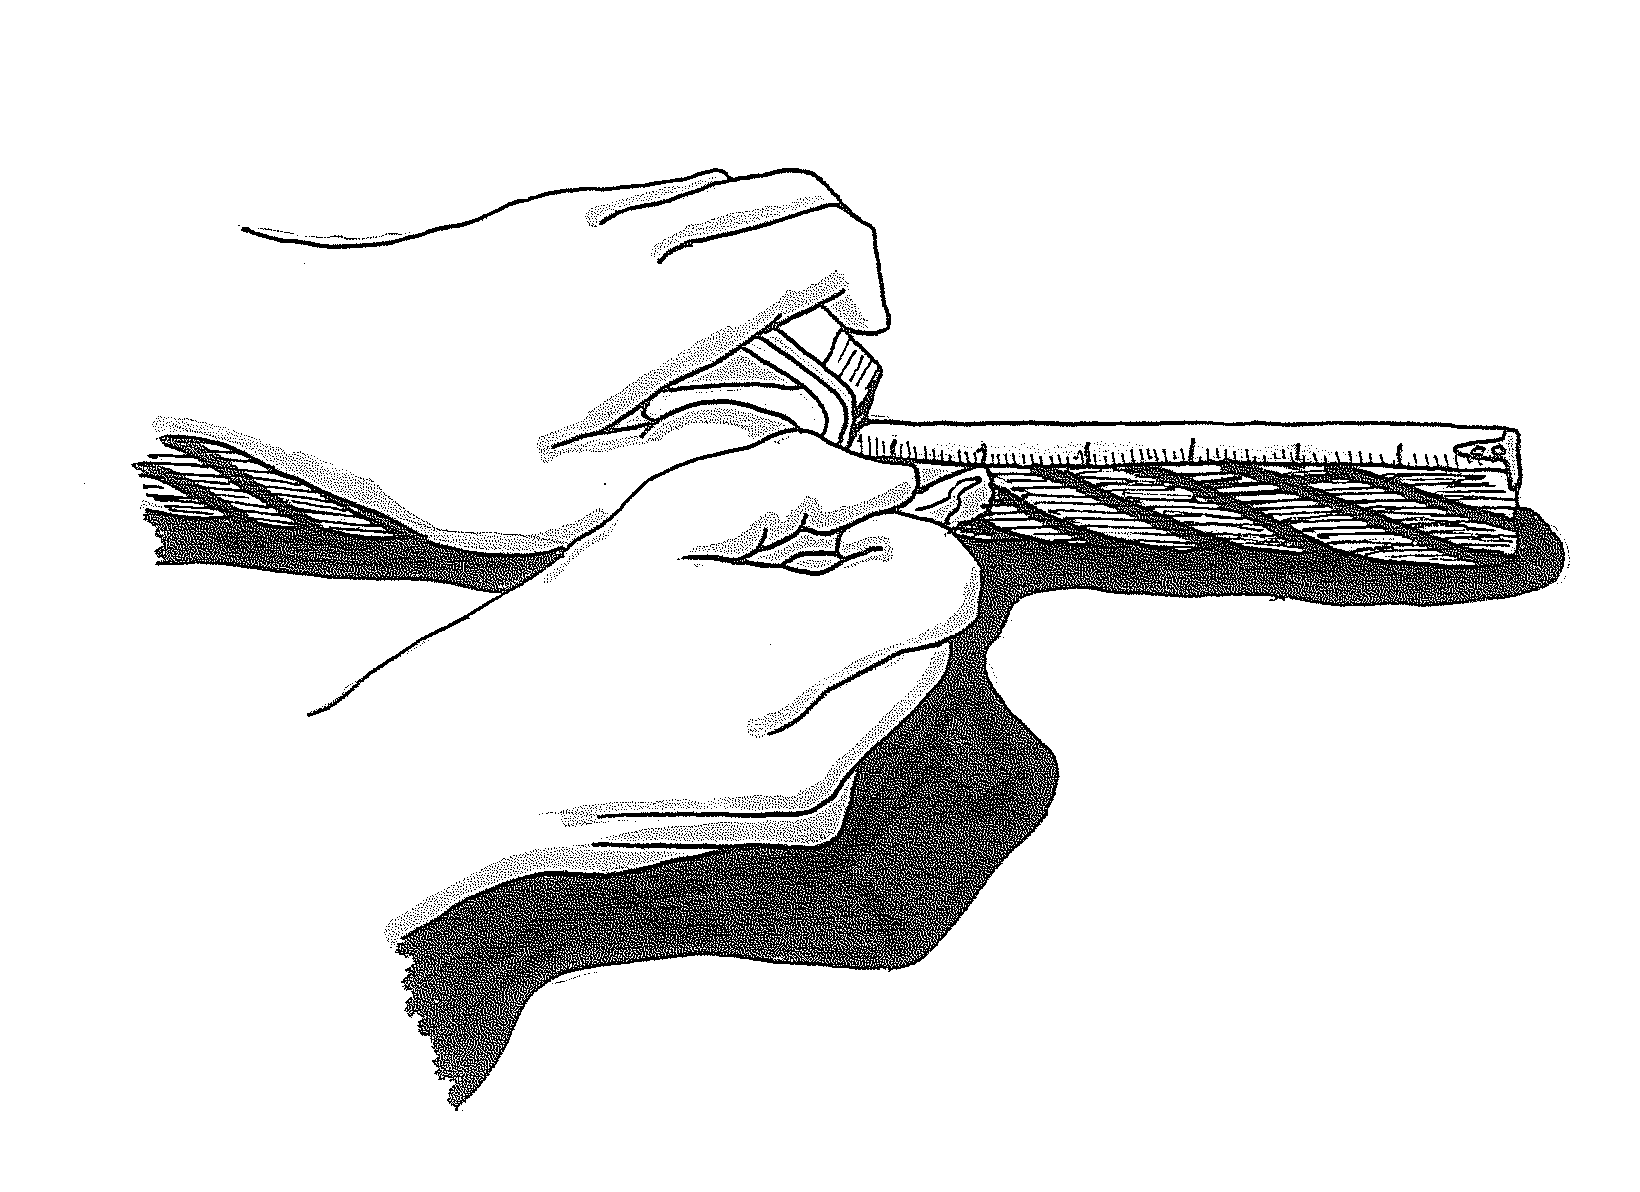 |
1. Measure the Rope Ends to be socketed 2. Apply Serving at Base of Socket |
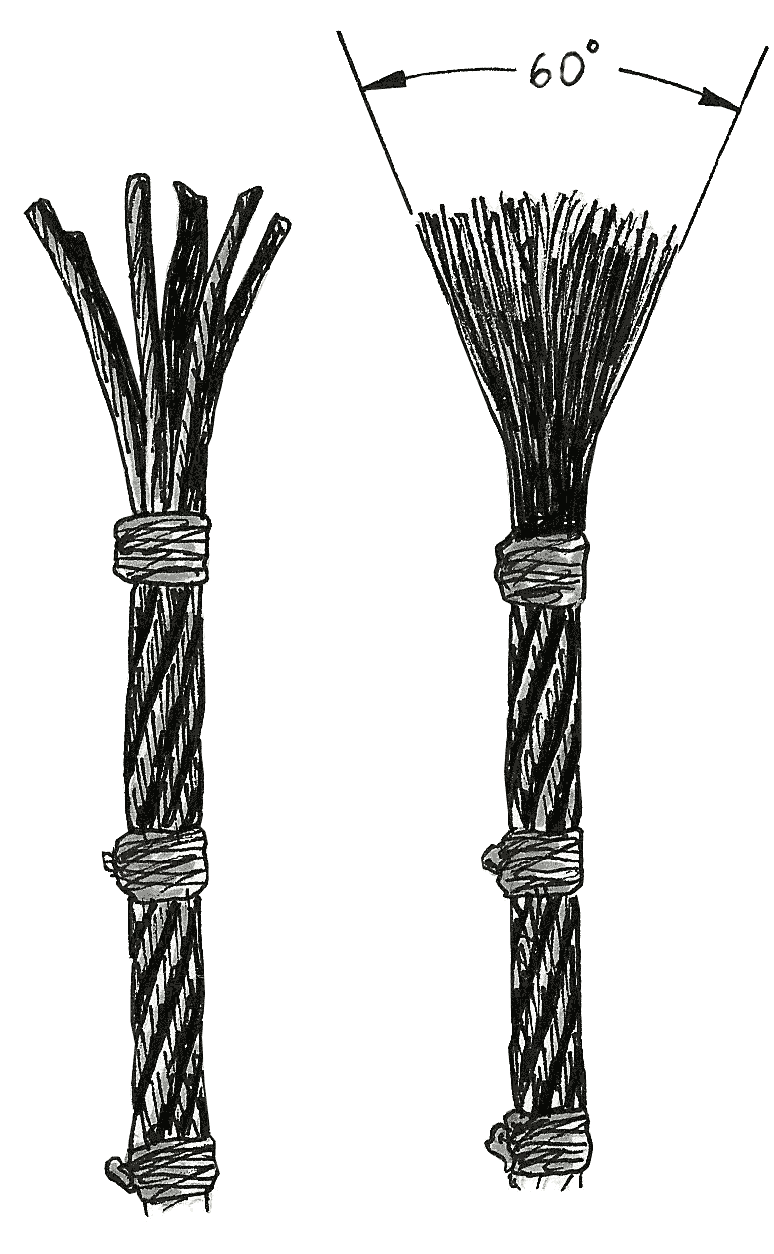 |
3. Broom Out Strand Wires |
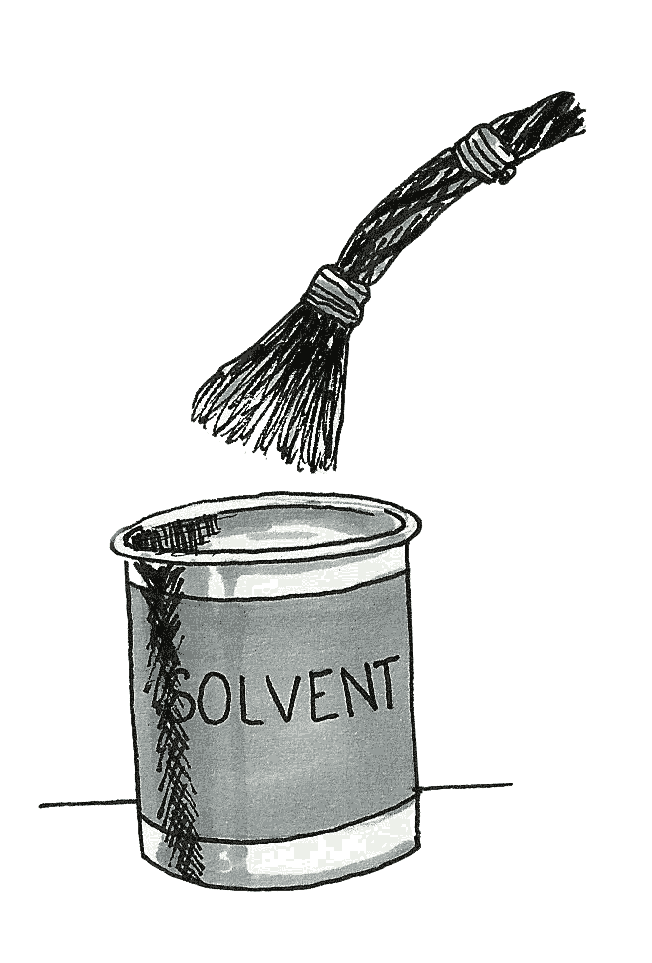 |
4. Clean the Broomed-Out Ends Other proven cleaning methods may be used, such as hot detergents. The continued availability of the current cleaning solvents is uncertain due to the federal regulations concerning ozone depleting substances. For information on available solvents consult the solvent suppliers. |
CAUTION: Breathing the vapor of this solvent is harmful; it should be used in a well-ventilated area. Be sure to follow the solvent manufacturer's instructions, and carefully observe all instructions printed on the label. Note that vapor densities may vary, some solvent vapors do not rise but may stay close to the ground. Refer to solvent MSDS sheets.
 |
Swish the broomed-out end in the solvent, then brush vigorously to remove all the grease and dirt. Make certain that the wires are clean to the very bottom of the broom up to the serving band (Fig. 3). One of the best and preferred cleaning methods for rope ends prior to socketing is ultrasonic cleaning using a suitable solvent. After this cleaning step, place the broomed-out end pointing downward, allowing it to remain until all solvent has evaporated and the wires are dry. Solvent should never be permitted to remain on the top or on the serving band since it will run down the wires when the rope is turned upright |
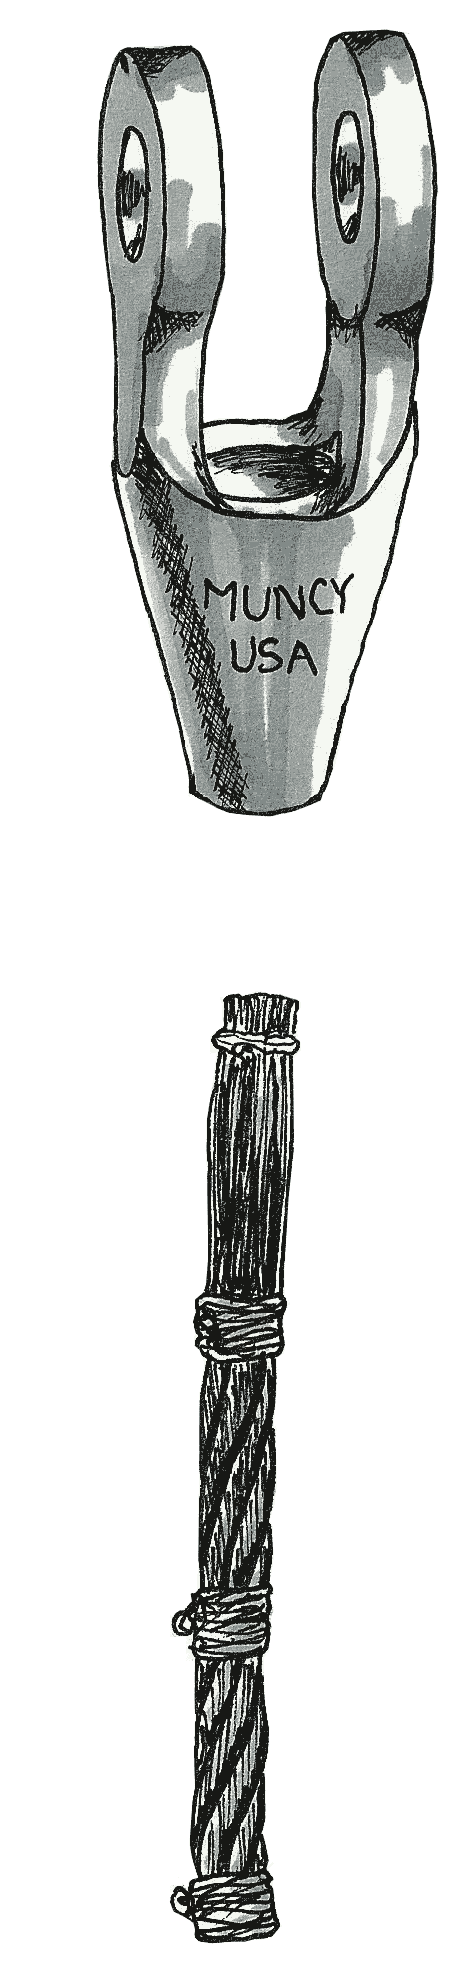 |
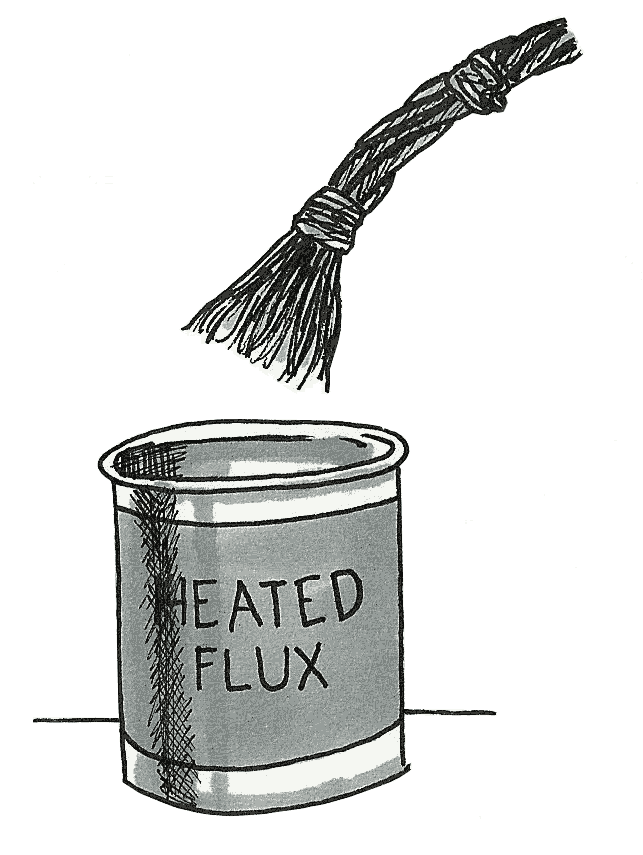
5. Dip the Broomed-Out Rope Ends in Flux 6. Close Rope Ends and Place Socket |
 |
Another method of placing the socket onto the rope is to first cover the end of the rope with a wrapping or split tubing; then slide the socket onto this section of the covered rope, this will prevent contamination of the inner surface of the socket by the wire rope lubricant. Once the end of the wire rope is cleaned and broomed, the socket can be slid into position and the wrapping or split tubing can be removed. CAUTION: Never heat a socket after it has been placed on the rope. This could cause damage to the rope. After the socket is on the rope, the wires should be distributed evenly in the socket basket so the zinc can surround each wire. Use extreme care in aligning the socket with the rope's center line, and in making certain there is a minimum vertical length of rope extending from the socket equal to about 30 rope diameters. This vertical length is necessary for rope balance. Premature wire breaks at the socket can occur if the rope is not balanced at pouring. Seal the socket base with fire clay or putty but make certain the material does not penetrate into the socket base. Should this occur, it could prevent the zinc from penetrating the full length of the socket basket thereby creating a void (fig 6). Insert Lube Tube in middle of basket, if required. |
 |
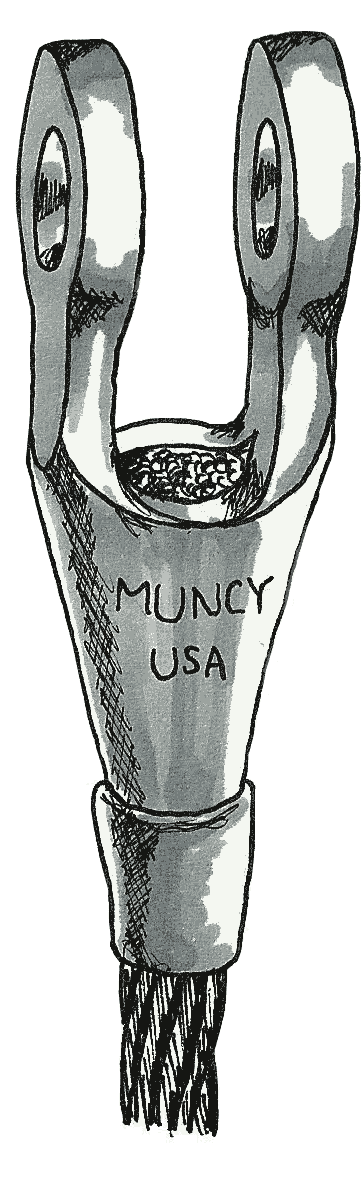
7. Pour the zinc CAUTION: Do not heat zinc above 1000 degrees F. Overheating of zinc may affect its bonding properties. The zinc temperatures may be measured with a portable pyrometer or thermocouple. Remove all dross from the top of the zinc pool before pouring. Pour the zinc in one continuous stream until it reaches the top of the basket and all wire ends are covered. There should be no "capping" of the socket, unless the customer requires a smooth surface with no shrinkage on the top of the basket. The use of a pinhole in the basket may be employed to allow air and voids within the zinc. 8. Remove Serving 9. Lubricate the Rope |
Spelter Socketing - Resin Poured
Before proceeding with a resin socketing procedure, check the resin manufacturer's instructions carefully. Each resin system has specific procedures and steps which must be followed in the order specified for the system to give the desired results. Since any resin system depends upon a chemical reaction, the procedure becomes critically important. Give particular attention to selecting sockets designed for resin socketing. Stainless steel spelter sockets and stainless steel rope or strand should not be used with resin socketing media. All properties and precautions of resins should be obtained from the resin manufacturers. Take special note of the "shelf life" of the resin being used.
The following steps give a general outline to follow for resin socketing; they should not be used as a substitute for detailed instructions supplied by the resin manufacturer.
|
1. Measure the Rope Ends to be socketed 2. Apply Serving at Base of Socket |
|
3. Broom Out Strand Wires |
|
4. Clean the Broomed-Out Ends |
CAUTION: Breathing the vapor of this solvent is harmful; it should be used in a well-ventilated area. Be sure to follow the solvent manufacturer's instructions, and carefully observe all instructions printed on the label. Note that vapor densities may vary, some solvent vapors do not rise but may stay close to the ground. Refer to solvent MSDS sheets.
|
5. Close Rope Ends and Place Socket |
|
In addition to normal sealing materials, non-hardening butyl rubber-base sealant or latex glazing compounds are satisfactory for this purpose. Make sure the sealant does not enter the base of the socket so the resin will be able to fill the complete depth of the socket basket (Fig. 12). 6. Pouring the Resin 7. Lubrication After Socket Attachment |
 |
8. Resin Properties |
Proper Loading & Warnings